 |
|
 |

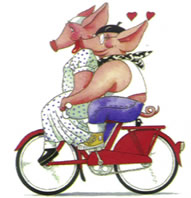
Wangapeka by Bike
Given our late start (after cycling in), and the little legs of Aria, we didn't make it all the way to the next hut, but we did enjoy a great walk on the track that left us eager to come back and tramp the whole thing. When we got back from the hike, we collected even more wood, so we could have a good fire and leave wood for the next hikers.
We make great use of the stove and had our hut much warmer than the kitchen in the holiday park the night before. It's stove was half the size for a room 10 times as big! After our two hard days, we all slept quite well in our cosy hut.
It was only a three day tour, but it did give us a chance to get away mid winter. There are heaps of huts accessible from gravel roads like this one, so we will likely do a few more of this type of trip. I did make one significant change after the ride. This was the first time I had use my new mountain bike for a tour, and I needed to do something different with the rack. But before describing the modification, first I'll offer a bit of background on this bike. Before coming to New Zealand, John and I had a couple of mountain bikes built. John was quite taken with the idea of Rohloff hubs and their simplicity of maintenance, lack of chain suck, and lack of derailleurs sticking out to snag passing limbs! We also decided to go with S+S couplers, having experienced how much easier they make travel on the tandem, and disk brakes, again to reduce maintenance (won't have to replace rims so often). We had a bit of a battle getting our frames delivered before leaving the US, but that's another story that John will someday write up and put on the web page, along with technical info on the Rohloff, couplers, and other features of these bike. One of the complications, according to the folks at Independent Fabrications who built the bikes, was using a rack with the disk brakes. The rack eyelets are above the mount for the disk brakes, meaning that a rack will be much higher than normal. This was the first time I'd even tried a rack on the bike, and I did find the higher centre of gravity made things less stable. (See pix at top of page). So after I got back, I rode down to a local engineering firm, and asked if they could modify my rack to mount lower. One of the reasons for having a tubular steel rack is that you can repair or modify it, right? So it was about time that I did this. They first suggested cutting off the lower part of the rack to clear the brake mechanism, but I didn't really want to do this to my very pricey Bruce Gordon rack. And I might want to use it on another bike someday. So we decided to spread the bottom, and add new mounting points that would clear the brake and lower the rack to just above the tyre. You can see the results below. I am happy to report that it has worked out quite well. I've been using small panniers (with lunch, vacuum bottle and warm clothes) on this bike for Sunday rides, with great luck.
If you want to know more about how the Rohloff works, send John email and pester him to get the web page written!
|
 We
arrived at the hut just in time to have some lunch. Simon and I had
each brought stoves and enough food for a week. So we fought over whose
food we would eat, with each of us wanting to get rid of as much weight
as possible! I got my soup into the pot first, so lightened my load
for the next day a tiny bit. We had soup sandwiches, and hot tea. One
of the other goals for this trip was show off to Simon how well a Trangia
alcohol burning stove would work - and I seem to have succeeded. He's
not going to rush out and replace his gas stove, but won't rubbish my
Trangia any more.
We
arrived at the hut just in time to have some lunch. Simon and I had
each brought stoves and enough food for a week. So we fought over whose
food we would eat, with each of us wanting to get rid of as much weight
as possible! I got my soup into the pot first, so lightened my load
for the next day a tiny bit. We had soup sandwiches, and hot tea. One
of the other goals for this trip was show off to Simon how well a Trangia
alcohol burning stove would work - and I seem to have succeeded. He's
not going to rush out and replace his gas stove, but won't rubbish my
Trangia any more. We
then collected some firewood making use of daylight. The hut had a pot
belly stove that would certainly see use in the evening. After all this
and washing dishes, we headed out on the track for a walk - taking along
snacks and water, but no sleeping bags and cooking gear!
We
then collected some firewood making use of daylight. The hut had a pot
belly stove that would certainly see use in the evening. After all this
and washing dishes, we headed out on the track for a walk - taking along
snacks and water, but no sleeping bags and cooking gear! We
then started dinner preparations. I lost the battle to use my food (we'd
eaten some of mine the night before), but we did use both cookers to
do soup and pasta, so I got rid of some of my fuel weight!
We
then started dinner preparations. I lost the battle to use my food (we'd
eaten some of mine the night before), but we did use both cookers to
do soup and pasta, so I got rid of some of my fuel weight! 
 The
next day we enjoyed hot oatmeal and tea before packing up for the journey
home. Simon threw his back out while sweeping up, and had a tough time
on the way home. The sky was a bit overcast, and clouds seemingly chased
us all the way back to Wakefield. We rode on very wet roads, but never
actually got rained on. We ended up taking the same route back that
Cara and I had taken out. We would have liked to go through a forestry
area, but as it was midweek, and we weren't sure whether there is active
logging where we wanted to go, we decided to play safe and take public
roads.
The
next day we enjoyed hot oatmeal and tea before packing up for the journey
home. Simon threw his back out while sweeping up, and had a tough time
on the way home. The sky was a bit overcast, and clouds seemingly chased
us all the way back to Wakefield. We rode on very wet roads, but never
actually got rained on. We ended up taking the same route back that
Cara and I had taken out. We would have liked to go through a forestry
area, but as it was midweek, and we weren't sure whether there is active
logging where we wanted to go, we decided to play safe and take public
roads.  Simon
found his back seized up if we stopped for long, so we kept all but
our lunch stop brief, and carried on back over Sunday Creek and Dovedale
Saddle. We stopped for lunch again at the playing fields in Dovedale,
where I got rid of the last of my soup and fuel before the last big
climb.
Simon
found his back seized up if we stopped for long, so we kept all but
our lunch stop brief, and carried on back over Sunday Creek and Dovedale
Saddle. We stopped for lunch again at the playing fields in Dovedale,
where I got rid of the last of my soup and fuel before the last big
climb. 


|